The RT 320
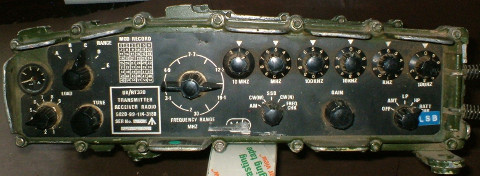
The UK/RT (Radio Transceiver) 320 is a simple Manpack radio transmitter which can operate in the 2-30MHz range with 100Hz increments, using the SSB (USB only) AM, or CW Morse (Narrow/Wide) Operating Modes.
Note that the frequency indicated by the Six (6) Decade Switches on the Front Panel is 2kHz above the suppressed carrier frequency, on SSB. There is a stop at the Zero (0) position, to enable use by touch, in the dark. If the frequency indicated does not corresponde to one in the selected range of the FREQUENCY RANGE switch, a continious high-pitched tone will be heard.
The Transmitter has a Power Output of 10-30W on High Power (HP), and 1-3W on Low Power (LP), and consumes 4-40W of power when in use.
The RT 320 is contained in a lightweight fully-sealed alloy case designed to protect the controls on the Front Panel, and connectors on the Top and Rear, from damage.
About 15,000 of these were produced, and used in active service for 35 years, so the condition of these Army Surplus units can be highly variable. Note that the case must be re-painted as required, so that there are no exposed metal areas, or else an RF burn may occur when operating on High Power.
The unit pictured was decribed as Grade 1 used, with no damage to any of the fins, just the paint. It was fully tested and serviced, with a switchable LSB mode added. Came with a free NOS (New Old Stock) battery from 2007-2008. Expect to pay around £200 each.
Ancillary Equipment
The UK/PRC (Portable Radio Communications) 320 HF Manpack Radio Station usually consists of the folowing CES (Complete Equipment Schedule) - Namely, a transceiver, and an Ancillaries Bag full of goodies, and an optional 5.4m Mast Kit, which I won't go into.
The Clansman system was developed in the early 70s, and phased out in the late 2000s, seeing service in NI, the Falklands, the Gulf War, Iraq, and Afghanistan.
These are a fun bit of history, somewhat cheap, portable, and have a high build quality, with good receive performance, while they last.
A nice bonus is that almost all of the accessories such as batteries, chargers, and headgear, are interchangeable betwen the Clansman family.
Ancillaries Bag
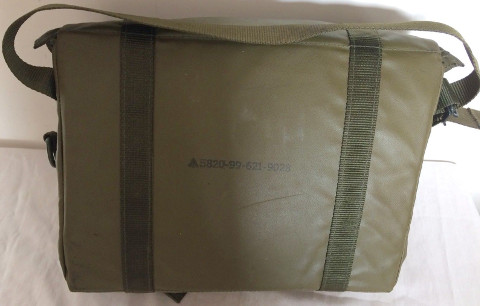
This General Purpose Bag is for carrying spare Batteries, Headsets, Handsets, etc...
GS/Lightweight Carrier
The RT 320 is fitted to either a GS Carrier, or a Lightweight "Para" Carrier. The former requires the use of the GS Carrier Adaptor.
The Carrier should be positioned fairly high on the shoulders, and close to the body, like a Rucksack.
The Harness and Waist Straps can be adjusted for fit, as required.
You almost certainly want the "Lightweight" variant and not the GS Carrier, for comfory.
GS Carrier (With GS Carrier Adaptor)
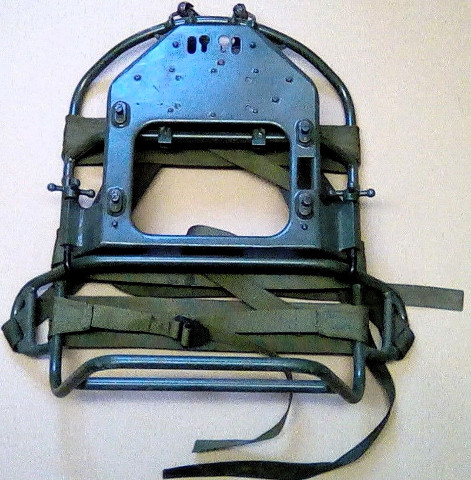
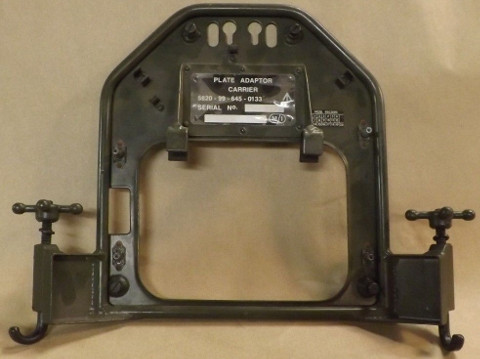
To fit to a GS carrier, the RT 320 is Firstly secured to the GS Carrier Adaptor using Four (4) Captive Screws.
Secondly, the Adaptor is then Hooked onto the Carrier, and secured using the Two (2) Screw Clamps.
The total weight of the system, when using the GS carrier, is ~11KG, the GS carrier and adptor weighting ~3KG combined, and the Lightweight Carrier half of that.
Lightweight Carrier
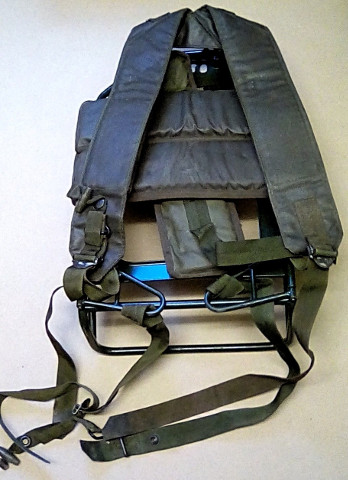
To fit directly to a Lightweight Carrier, you just use the Four (4) Capitve Screws, on their own, no Adaptor is required.
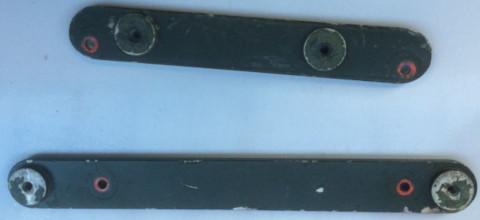
Mounting Bars
A pair of Mounting Bars is required to fit the unit to either Carrier. Sometimes these go missing, but can be picked up for around £5.
Solar Shield

With either Carrrier, a Solar Shield may be fitted if required, to protect the RT 320 from strong direct sunlight. However, the RT 320 will handle any Operating Temperature between -37 and +52 Degrees.
One of these can be picked up for around £5.
Rucksack Radio Carrier
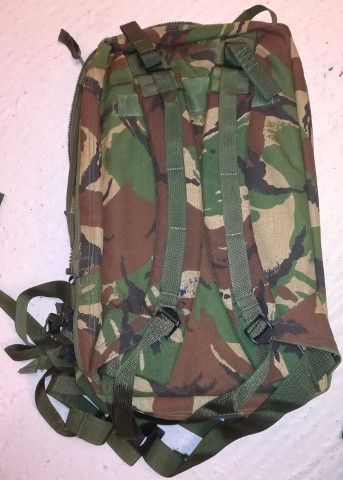
If you want to go even lighter, there is also the Rucksack Radio Carrier, a zipped DPM-pattern fabric rusksack with a padded back, and a number of straps, for securing thre radio internally. It will also accept the zipped side pockets from the normal Bergen, which should be ample to carry any Ancillaries.
The unit pictured was described as "As New". One of thse can be picked up for under £20.
3.3Ah 24v Battery
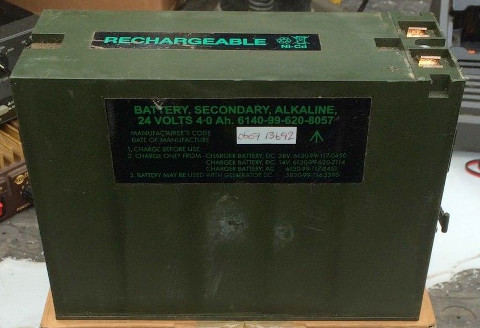
Before fitting the Clansman 3.3Ah 24v NiCd Battery, Firstly, ensure that the MODE SWITCH on the RT 230 is set to OFF.
Secondly, lift the Battery Retaining Latches, press the Battery flat against the underside of radio, and securely fit the Battery using the Locating Studs, such that both of the Contacts are fully engaged upon securing the Battery Retaining Latches. It should be impossible to fasten the Battery Retaining Latches with the Battery the wrong way around.
Note that battery connections must be kept clean and dry.
The unit pictured came with the set and was described as NOS (New Old Stock) from 2007-2008. These start at about £20 otherwise.
Checking the Battery
Firstly, set the MODE SWITCH to BATT CHK and CW W/N.
Secondly, depress the Pressel or Morse Key, and check the meter needle moved to above the Second (2nd), of the Five (5) marks.
There is also a FREQ CHK function, but I won't go into this.
Battery Extension Cable
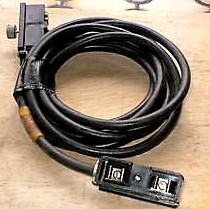
If it is not possible to clip the battery to the bottom of the RT 320, you can operate the RT 320 from a seperate 24V Battery using the Battery Extension Cable. Observe Polarity and ensure that the plug and socket are correctly oriented using the Battery Locating Studs, and that the Socket Securing Screws are tightened.
This battery should provide up to 12 hours of operation, and weighs ~4KG.
This was originally intended so that in very cold weather, the Battery could be stored inside the jacket to raise the working temperature. They are 1.5-2M in length and if you cut off the battery end, allow operation from a suitable 24V Bench Power Supply.
One of these can be picked up for around £6.50
Charging
When not in use, the Battery should be removed and charged. This will take 1.25-4 Hours. The DC and AC Charging Units should prevent overcharging.
DC Charging Unit (DCCU)
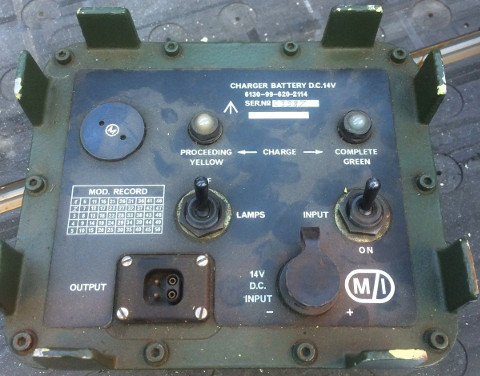
When operating in a vehicle, the radio Must be run from it's own Battery, rather than directly from the vehicle supply.
A 12/14V or 24/28V DC Charging Unit (DCCU) can be used to float-charge a Clansman 3.3Ah or 1Ah Battery, however.
One of these can be picked up for around £30.
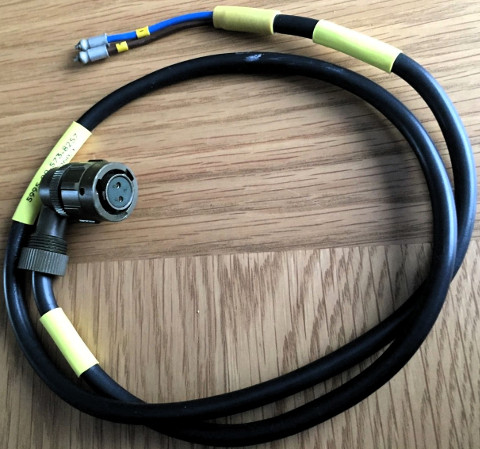
Firstly, using the DC Charging Unit Supply Cable, the DC Input is connected to an appropriate DC supply, ensuring correct polarity.
One of these can be picked up for around £10.
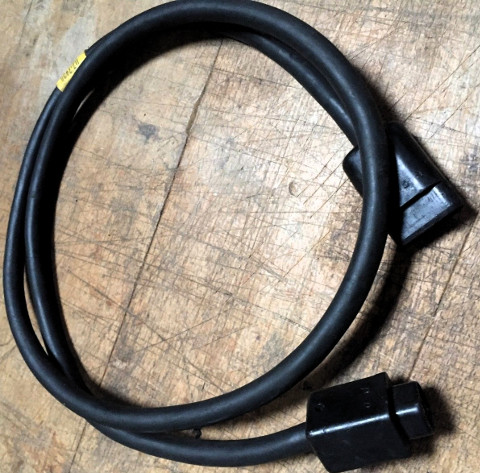
Secondly, using the Battery Charging Cable, the Charging Connector on the Battery is connected to the Output Connector.
Thirdly, the INPUT switch is set to ON, and the LAMPS switch is set to ON. The CHARGE PROCEEDING lamp will light YELLOW and eventually will extinguish, to be replaced by a GREEN coloured CHARGE COMPLETE lamp. A flashing CHARGE COMPLETE lamp indicates a fault.
One of these can be picked up for around £5.
AC Charging Unit (ACCU)
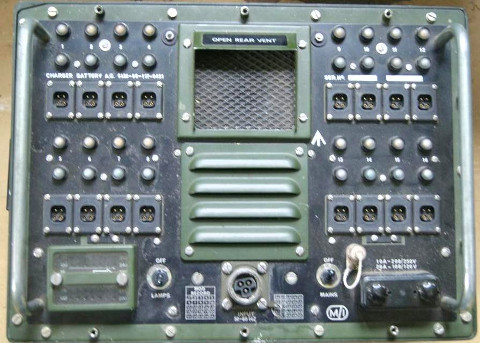
The AC Charging Unit can recharge up to Sixteen (16) Clansman 3.3Ah or 1Ah Batteries at a time, from the mains supply. I won't go into this.
Hand Generator
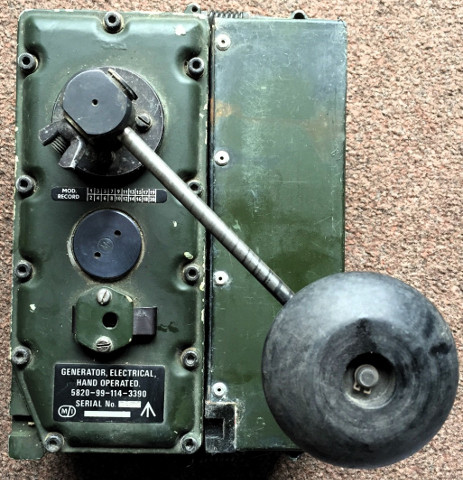
A 1Ah Secondary Battery can be used with a Hand Generator, to maintain charge for receiving in an emergency. It is designed to be operated continously during receive, to maintain a float charge.
The 1Ah Battery is smaller, allowing both it and the Hand Generator to be installed as part of the manpack, in place of the usual 3.3Ah Battery. The Hand Generator can only be used with the 3.3Ah battery in conjunction wuth a Battery Extension Cable.
To use, turn the handle clockwise until the Generator Indicator Lamp glows. It wil extinguish once sufficient speed has been applied. Continue turning at that speed.
Antennas
The RT 320 has a nice built in Antenna Tuning Unit (ATU), cable of tuning end-fed long wire antennas, as well as whips, and a BNC for an external dipole antenna.
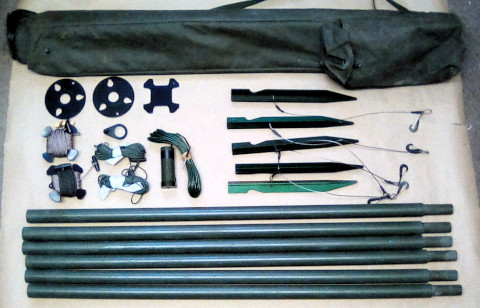
2.4m Battle Whip Antenna and Gooseneck Adaptor
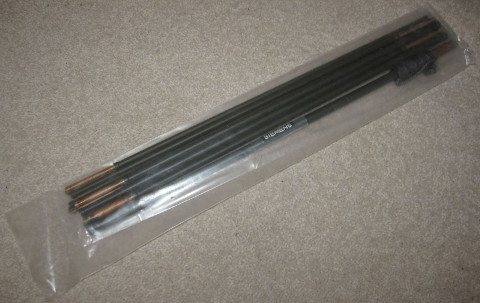
The vertical Manpack Whip Antenna is most useful in the Manpack role, and can provide short-range ground-wave SSB communications. This 2.4m Antenna consists of sections of tubing connected together with a cord.
One of these can be picked up for around £15.
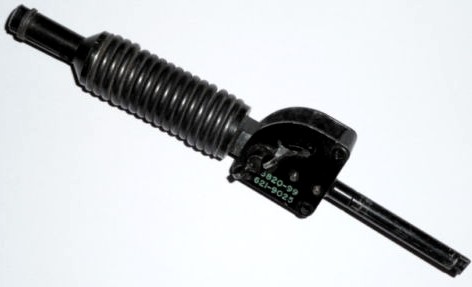
Firstly, fit together the Eight (8) Antenna Sections, and fit into the Gooseneck Whip Adaptor on the top of the set, in the vertical operating position. There is a Ferrule which slips over the Antenna Base - This sits over the Cord, which can be stored wound up inside it.
One of these can be picked up for around £25.
Wire Antennas

An End-Fed or Dipole Antenna can be used for long range sky-wave communications.
These consist of spools of insulated braid and throwing cord on a winder, with clear markings to assist with measuring out the correct antenna length.
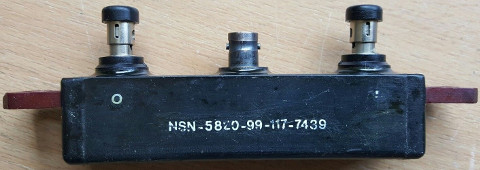
These can be attached to a push terminal on the top of the set. Ensure the Coaxial BNC Link between the TX socket, and the Antenna Tuning Unit (ATU) is present.
Dipole Antenna
Two (2) such spools can be used to form a Dipole Antenna, in conjunction with a Dipole Centre Junction and an Antenna Feeder Cable.
Various Dipole configurations are possible.
Firstly adjust the length of each Dipole Element to the length shown in the table on the casing.

Secondly, you must remove the Coaxial BNC Link between the Internal Antenna Tuner (ATU) and the the TX socket. This is so we do not use the ATU - Antenna matching is provided solely by adjusting the lengths of the Dipole Elements. Do not lose the link! - They are £5-10 each to replace.
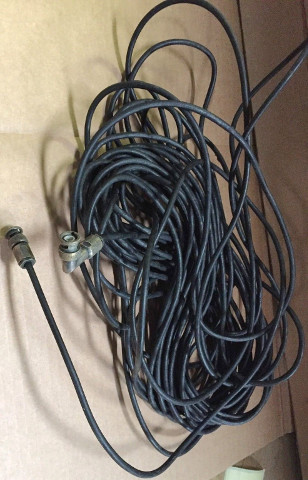
Thirdly, connect the Dipole Centre Junction to the TX socket using the Antenna Feeder Cable, making use of the Strain Relief devices.
The Dipole Centre Junction and Feeder can be picked up for under £15.
Antenna Counterpoise
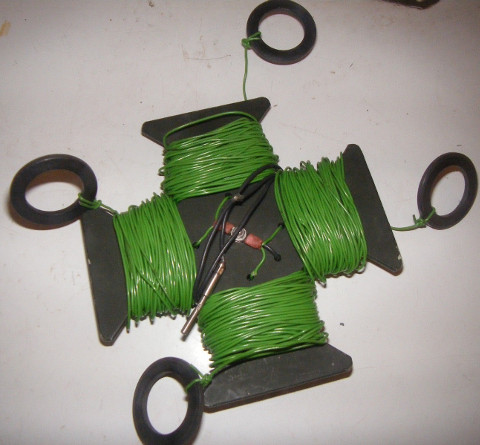
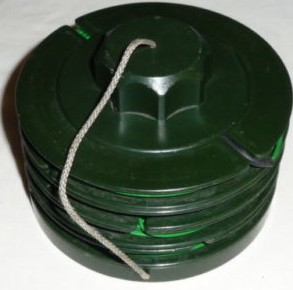
The Antenna Counterpoise compromised Four (4) 9m lengths of insulated wire attached to a winder. This provides an Artificial Earth (Ground Plane), to improve performance, and must always be used with end-fed antennas.
The Four (4) lengths of wire are spread radially on the ground and connected to the Earth Terminal on the RT 320, using a short lead.
There are two different types of these, as shown above. I personally much prefer the spool type. These can vary wildly in price from £5-£20.
Antenna Tuning
Firstly, set the MODE SWITCH to ANT, and that the Coaxial BNC Link is installed between the TX socket, and the Antenna Tuning Unit (ATU).
Secondly, adjust the RANGE and LOAD switches on the Antenna Tuning Unit (ATU) as per the desired frequency (in MHz), and Antenna configiration, as per the Table on the case - i.e. B and 3, in the case of the 2.4m Manpack Whip Antenna.
Thirdly, depress the Pressel or Morse Key, adjust the TUNE control for the maximum reading, then to fine-tune, adjust the LOAD switch for the maximum reading. Select the lowest LOAD value required to gain a maximum reading. Finally, adjust the TUNE control again again for a maximum reading, and release the Pressel.
Finally, use the GAIN control to adust the volume.
Note that when operating Manpack, your body is part of the Antenna Ground Plane, and your movement can affect the Antenna Impedence, so Re-Tuning may be required.
5.4m Mast Kit
There is a 5.4m Mast Kit, but I won't go into this, as I don't have one. They look nice, but are going for up to £100 at the moment.
Headset Assemblies, Handsets, and Morse Keys
There are a number of different types of headgear available.
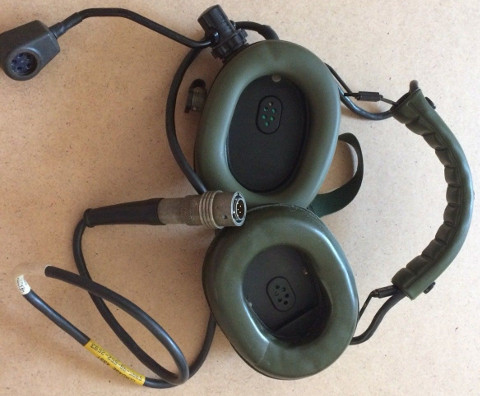
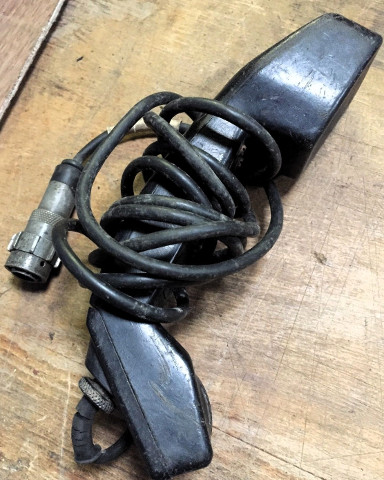
Either of the Two (2) Audio Sockets can be used for headgear, handset, speaker, and/or a key.
To connect a Headset or Handset, insert the plug, twisting until the centre is correctly located, then lock by turning the outer ring clockwise.
The Headset Microphone must be worn 1CM in front of the mouth.
One of these can be picked up for around £10.
Pressel / PTT
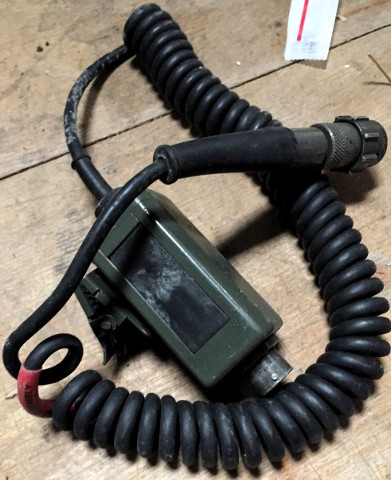
You will need one of these for use with most normal Infantry/Armoured Headsets. The Telephone-Type Handset has one built-in, as does the specialist Transducer headset, and Throat Mic.
A sidetone will be heard when depressing the Pressel.
One of these can be picked up for around £5.
Morse Key

Adjust the G (Gap) screw, and T (Tension) screw, as required.
A sidetone will be heard when operating the Morse Key.
One of these can be picked up for around £15.
Respirator Microphone
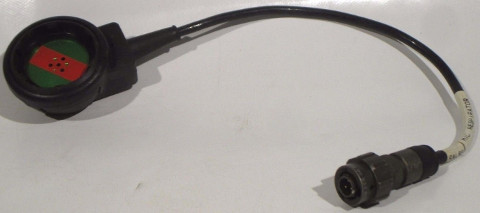
There is a also Respirator (Gas Mask) Microphone. This is used alongside the normal Headset.
Firstly, the Respirator (Gas Mask) is put on. Secondly, the Headset is put on. Thirdly, the Respirator Microphone is connected to the small socket on the side of the Headset, and affixed to the front of the Respirator. Finally, the Headset Micrphone Boom is then stored vertically, out of the way.
One of these can be picked up for under £5.